We’ve all been there. Aperture and shutter speed set perfectly according to the meter, exposure on the dot and subject looking great, but when you go to review your picture, it’s strangely awash in a sea of orange. Alternatively, your photo is so dull, it looks like none of the colors even resemble what is actually in front of you. Sometimes the color cast is not super obvious but there nonetheless and this phenomenon is due to the White Balance on your image going awry, giving your picture the wrong color temperature.
This week we look at how to correct the color in your pictures using White Balance and color temperatures on your camera. We look at what White Balance is, how to use presets and creative uses of white balance in your photos.
Article continues after the jump
Wait, what? Temperature? Believe it or not, light sources are never 100% pure white but instead have a certain color temperature to it. From that, a scene can be described as either on the “warm” side or a “cool” side of the temperature, meaning it’s either toward the orange/yellow cast or blue cast. As a reference, here is how color temperature relates to some common light sources. (Color temperature is measured in Degrees Kelvin).
Color Temperature Light Source
1000-2000 K Candlelight
2500-3500 K Tungsten Bulb (household variety)
3000-4000 K Sunrise/Sunset (clear sky)
4000-5000 K Fluorescent Lamps
5000-5500 K Electronic Flash
5000-6500 K Daylight with Clear Sky (sun overhead)
6500-8000 K Moderately Overcast Sky
9000-10000 K Shade or Heavily Overcast Sky

Photo Credit: PhotographyMad.com
You can think about white balance as helping our camera establish what is actually true white despite the lighting conditions. When our eyes see a change in lighting condition, it automatically adjusts and renders the whites in the scene as white but a camera is not all that great at doing so. Most of the time you won’t have to touch your white balance setting on your camera as Auto White Balance gets it right most of the time, but if it’s giving you trouble, you can always set it to one of the custom presets that should be available on your camera.

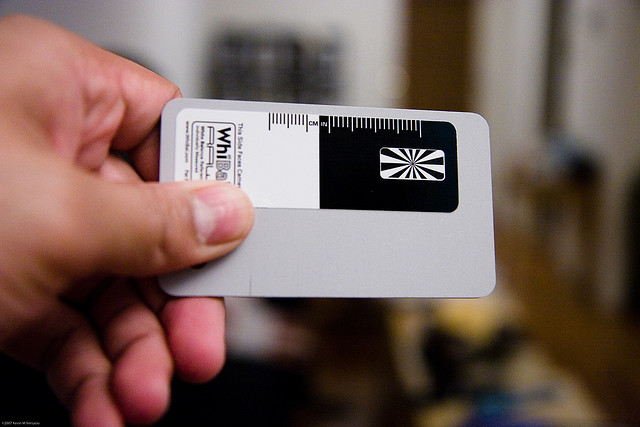
Once in a while, you’ll want something a little more accurate than a preset value. To accurately gauge what kelvin value is best for the scene, you’ll need to use a white balance card, white object, or even just a simple white piece of paper as a reference sample. From this, your camera will be able to set a custom white balance just for the scene. If your camera doesn’t support that, then just take a picture with the white reference and use your post processing tool of choice to get your kelvin value, using it in all other pictures in the same conditions. Sometimes an 18% grey card is used instead of a full white one, resulting in a picture with a different feel.

Photo Credit: PhotographyMad.com
You don’t always need to set your White Balance to the right value. In some instances, an Auto corrected white balance value will correct warm colors to a cooler, more dull image. So in the case of the image above, a cooler preset was selected to enhance the warm reds and oranges and subdue the blues and greens. Give it a try next time!
Whether getting your white balance settings right on the camera, or editing it in post, you now have hopefully a deeper understanding about color temperature and how cool or warm an image is.
Follow us on Instagram, Facebook, Twitter or Telegram for more updates and breaking news.

![[REVISIT] Back To Basics: White Balance 1 WhiteBalance banner](https://www.lowyat.net/wp-content/uploads/2013/01/WhiteBalance_banner.jpeg)
