Part 1: ISO & Aperture
Part 2: Shutter Speed & Summary
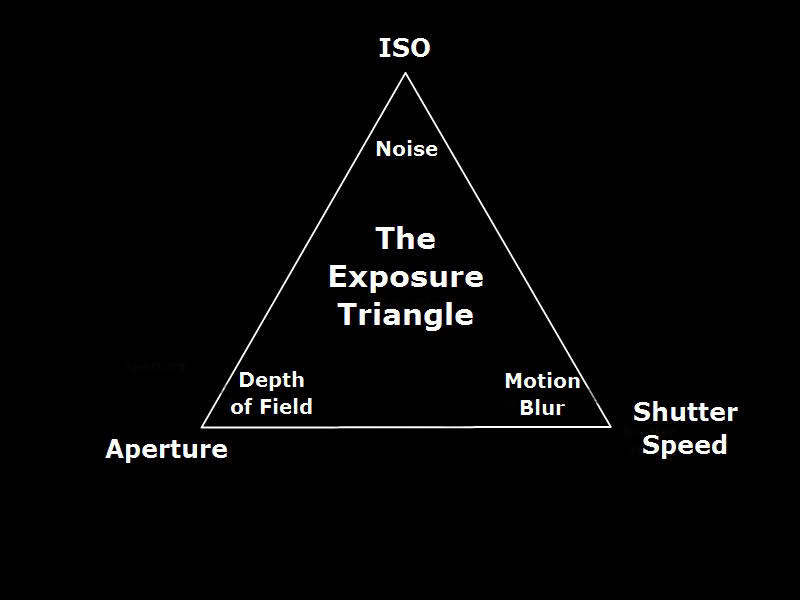
For the last 2 weeks, we’ve been looking at how the 3 points of the exposure triangle relate to each other and create a good exposure. You should now be able to grasp fully the impact of each of the elements on the overall exposure of the image, if not, hit up the links above and read through them again. Now we are ready to put all these in practice with your brand spanking new DSLR, but where do you start? Isn’t that green box easier? I’m taking portraits, so wouldn’t the portrait mode preset be better?
This week we go through the different “Manual Modes” that a DSLR has to get you better acquainted with shooting. We will wean you off the dreaded Green Box and Presets to be able to mould and control exposure as you see fit. So if you’re ready, hit up the jump to continue!
Article Continues After The Jump
Fully Manual Mode (M On both Canon & Nikon)

Aperture = User adjusted / Shutter Speed = User Adjusted
A lot of misguided photographers will tell you that you HAVE to shoot manual to take good pictures. While there is SOME truth in that statement, don’t believe the hype. While manual mode allows you to control and adjust the Aperture and Shutter Speed for MAXIMUM control over exposure. Here lies the issue, it’s great to be able to be in full control, but fine tuning your exposure through trial and error may be more trouble than it’s worth. There are just some instances where one of the other modes will suffice rather than go full manual. On the flip side, when shooting in a situation with very quickly changing light i.e. a concert, Manual mode is quite important.
Program Auto Mode (P on Both Canon & Nikon)

Aperture = Determined By Camera / Shutter Speed = Determined By Camera
Program Auto mode allows the camera to determine both the ideal values for Aperture and Shutter speed. Some cameras will even allow you to shift the aperture and shutter speed away from the value either lower or higher and the other value will be adjusted accordingly to keep the same exposure. You may wonder what difference this is from the dreaded green box? In P mode, you have to adjust white balance, flash, exposure compensation instead of completely leaving it all to the camera. A great way to learn, most people start off on P.
Shutter Priority Mode (Tv on Canon and S on Nikon)

Aperture = Determined By Camera / Shutter Speed = User Adjusted
The most seldom used of all the modes, shutter priority allows you to pick the shutter speed and the camera will adjust the aperture accordingly. The use for this mode is if you want to freeze action with a high shutter speed and don’t want to get a motion blur. The problem with this is that the camera can only set aperture to the highest/lowest value with relation to the lens. If you’re using a kit lens, this would probably not be a great mode for you to play with.
Aperture Priority Mode (Av on Canon and A on Nikon)

Aperture = User Adjusted / Shutter Speed = Determined By Camera
Aperture priority is one of the most commonly used of the modes by photographers. There are many jobs that i’ve done shooting solely on Aperture Priority. The fact that you can control the depth of field with the Aperture while the camera determines the shutter speed is a little more useful than the Shutter Priority mode, but again, when the light goes too low, handholding at low shutter speeds could be a problem. For an everyday manual shooting mode, Aperture priority would be your best bet in my opinion.
Summary
There are situations that each of these modes are ideal for and there is no good or bad. The trick to mastering these modes is figuring out which mode suits which way of shooting and situation. For example, I usually shoot Manual when I shoot concerts because I want an even exposure even through the varying lights and brightness. I’ll shoot Aperture priority at events so i don’t have to worry about the settings and can concentrate on shooting. I don’t generally use Shutter Priority, but if I did, it would be at a sports event, when I have to free movement.
Now that you’ve got the lowdown, there is no replacement or tutorial for practice. The more you shoot, the more you will understand about your camera and the subjects you shoot. Good luck and remember, the first 10,000 photos you shoot are always your worst!
Got any questions or suggestions or what to cover? Hit us up on Facebook or Twitter!
Follow us on Instagram, Facebook, Twitter or Telegram for more updates and breaking news.


