This article was originally written by Chan Wern Shen on the old Lowyat.NET website.
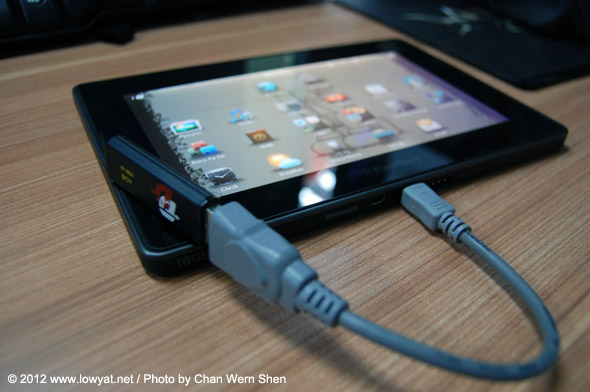
We took a break from the plethora of CES related news today to fiddle around with our BlackBerry PlayBook after reading this interesting tutorial on how to get USB host mode to work on the device.
USB host mode is available by default on lots of newer Android devices and can be activated on the iPad by purchasing a specialized USB connector, so the premise of being able to read files directly off a flash drive, a media card reader or an external hard drive on the PlayBook was definitely enticing enough for us to try. Little did we know that it would take us the better part of a day to figure out how to get a seemingly simple looking set of instructions to work properly, and since we already went through hell, these tips may help to save you a couple of precious hours!
Story continues after the jump.
The OG instructions
According to elTechnoBlog, the site which this pseudo-hack originated from, the process is a relatively simple one.
From elTechnoBlog:
When you have your USB OTG cable, you can proceed to run the commands to load the necessary kernel drivers. The nice part is that everything is already on the PlayBook, so you don’t really need to upload anything. The commands you will need to run are the following:slay RIM_usbmgr-Winchester
slay io-usb
slay devb-umass
sleep 2
RIM_usbmgr-Winchester -m0s
io-usb -domap4430-mg ioport=0x4a0ab000,irq=124
sleep 2
waitfor /dev/io-usb/io-usb 4
devb-umass cam pnp blk automount=+hd6t6:/accounts/1000/shared/usb:dos,
automount=+hd6:/accounts/1000/shared/usb:dosThe only line you really need to pay attention to, is the last one. It shows where the pendrive will be automatically mounted after you connect it. You can specify different mount points for different partitions just separating them by comas (in my example command, hd6t6 and hd6 shown)
The other commands just kill the USB server running and start it with the required commands to be able to run the USB port as a host port. There is also a command to load the kernel driver (io-usb domap….).
Unfortunately, unless you are a hardened developer who knows what kernels are, then you’ll probably need to spend a couple of minutes (or in our case, hours) to find out how to even execute the above commands. Don’t worry though. Keep reading and we’ll show you everything…
What you’ll need
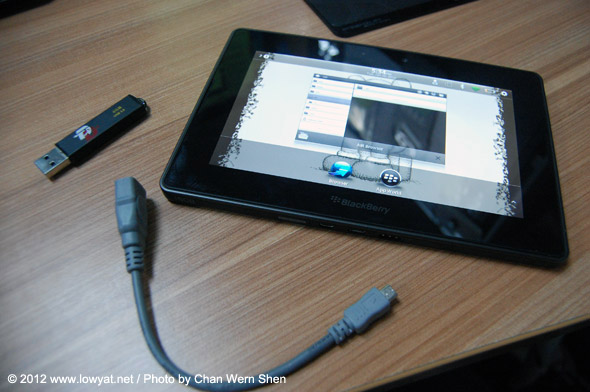
The first part of elTechnoBlog’s walkthrough teaches you how to solder a male mini-USB connector to a female USB port, but thanks to the widespread availability of third party accessories here in KL, we were able to get what we needed without breaking much sweat.
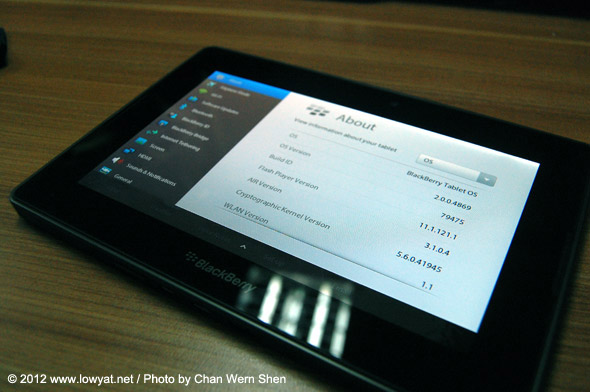
First things first, you’ll need a rooted BlackBerry PlayBook that is running on the OS 2 Developer Beta. This won’t work on regular retail PlayBooks because you’ll have to SSH into the device for it to work. We didn’t update the OS on our PlayBook since completing our last hack, so our device was still running on the 2.0.0.4869 build.
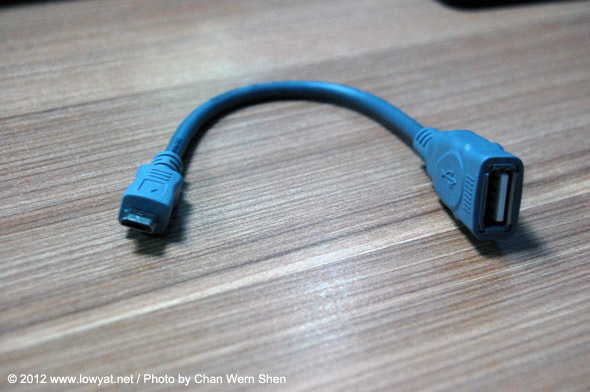
The next item, and probably the most important item of all, is this little device: a male mini-USB to female USB converter. Instead of cutting up and soldering two perfectly good cables, we opted to pick one up from the IT section in Mid Valley Megamall. It cost us RM19, which is pretty steep for such a simple cable, but we’re pretty sure you can pick one up around town for a fraction of that price. Alternatively, if you don’t mind waiting then you can pick one up from our favorite purveyor of awkward odds and ends –www.dealextreme.com – for as low as $1.99 with free shipping.

Lastly, you will need Dingleberry SSH and a WiFi connection. You will almost definitely have used Dingleberry before, since there is practically no other way to root your PlayBook, and if you have deleted it then you better redownload it before you start. You will also need your computer and your PlayBook to be connected to the same WiFi router. Trust us.
The process
Now that you have all your equipment handy, hook up your PlayBook to the same WiFi network as your computer. Turn on Development Mode on your PlayBook, boot up Dingleberry and click on the Dingle SSH button on the top of the screen. A window will pop up asking for your IP address. Now, instead of keying in the developer IP address, key in the PlayBook’s IP address.
For example, our PlayBook’s developer IP address is 169.254.0.1 but the device’s IP address is 192.168.2.111. We connected our SSH client to the latter and were soon greeted by the ominous #.

Now that you’re SSH-ed into your PlayBook the first thing that you want to do (that isn’t in elTechnoBlog’s how to) is head on into your Shared folder. This is the folder that hosts several existing directories that your PlayBook recognizes automatically. This can be done by typing cd /accounts/1000/shared. Using our limited Unix knowledge, we did an ls to see the contents of the directory.

Once inside the Shared folder, we created a folder called USB. This will serve as the folder where the contents of your USB drive will be mounted later on so it is important to create this folder. Without creating this folder, the entire process will not work.
You can create a folder by typing mkdir /accounts/1000/shared/usb. It is important to type in the entire string because simply typing mkdir /usb will create the USB folder in the root directory instead of in the Shared directory.
Once the folder is created, you need to change the permissions of this folder to full read/write/delete. This can be done by typingchmod 777 /accounts/1000/shared/usb.
Tip: If you prefer, you can also create the folder and set the permissions through a SSH FTP client like WinSCP instead of doing it over command line SSH.

Now that your destination folder is created, it is time to get busy with some code tweaking. We followed the instructions from elTechnoBlog word for word since we knew f*** all about QNX commands or what they did, and on our first time through, met an interesting problem.
Code from elTechnoBlog:
slay RIM_usbmgr-Winchester
slay io-usb
slay devb-umass
sleep 2
RIM_usbmgr-Winchester -m0s
io-usb -domap4430-mg ioport=0x4a0ab000,irq=124
sleep 2
waitfor /dev/io-usb/io-usb 4
devb-umass cam pnp blk automount=+hd6t6:/accounts/1000/shared/usb:dos,
automount=+hd6:/accounts/1000/shared/usb:dos
On our first run, we connected the PlayBook to our PC via USB. After typing in the first line of code however, the connection died and SSH logged us out. Puzzled by what had just happened and worried that we had crashed the PlayBook before we had even done anything close to hacking/tweaking the device, we soon realized that the first line of code effectively kills the device’s USB functionality. This is why you should SSH over WiFi.
A quick reboot and a face palm later, we SSH-ed in over WiFi and reentered the code line by line.
Tip: You may or may not encounter as many lines / errors as we did in the image above, but if you do then disregard them. If you are prompted for a Y / N response after killing devb-umass, just key in Y until the # returns, then continue with the rest of the codes.
Tip: Be very careful to key in the code exactly as you see it. One less 0 (zero) will result in an error, as will wrongly keying in a 0 (zero) as an O (capital o). Simply put, there are no O’s (capital o’s) in the code.

When you are done entering the codes, hook up your USB flash drive to your PlayBook and enter df into the prompt. This will list out the drives that are connected to your PlayBook. If you have keyed in the codes correctly, then the USB flash drive should be detected. On the right of the screen, you should see the path to where it is mounted.
If you are observant enough, you will note that our USB flash drive is connected to /dev/hd7 and not /dev/hd6 as it should in the code above. This is because we couldn’t get our drive detected when using elTechnoBlog’s code in verbatim. After reading through the comments section, we found out that the last line of the code can be modified to suit your PlayBook’s file structure.
Because of this, our last line of code was changed from the original to: devb-umass cam pnp blk automount=hd7t12:/accounts/1000/shared/usb, automount=hd7:/accounts/1000/shared/usb.
Looking back at the image above, a surefire way of knowing that your code is working is by looking at the right most column. As long as your USB flash drive is mounted to /accounts/1000/shared/usb, then it should work correctly.
Tip: If you key in the wrong code at any time during the process, don’t panic. Just continue from where you left off regardless of the error messages that pop up. Rebooting the PlayBook will reset the code to default, so if you’re worried about screwing up your PlayBook by entering the wrong codes then give your device a reboot and start again from step 1.
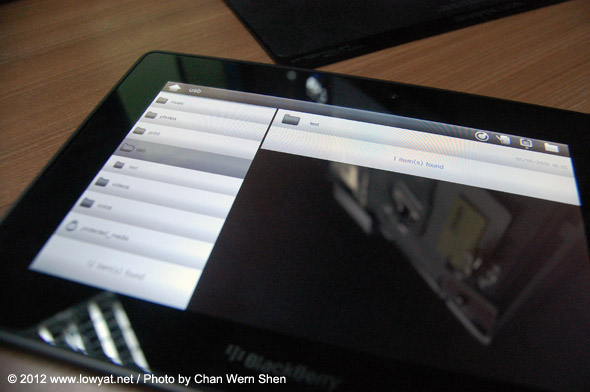
If you have made it this far, then you probably have done everything correctly. But if you’re not sure if it’ll work, then this step will give you a definite answer. If you don’t already have it installed, head on to App World and download a file explorer like Air Browser.
In Air Browser, you will be able to see the folders within your Shared folder. Remember that USB folder which you created as one of your first steps? Well, if you did it right then it will appear here, and if it doesn’t then you need to start again from the beginning.
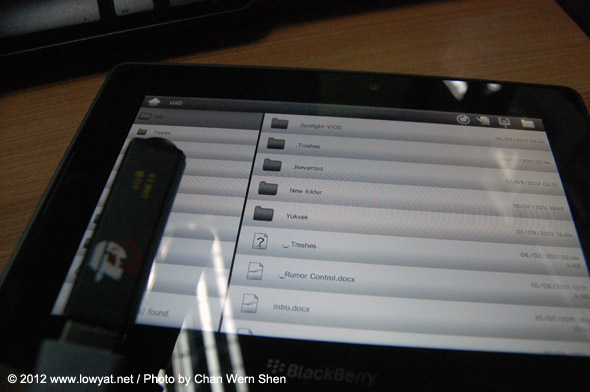
Now plug in your USB flash drive and tap on the USB folder. If you have Air Browser already opened then hit the refresh button on the top right of the window.
You should now have a view of all the files on your USB flash drive. Unfortunately though, Air Browser only lets you open, rename, delete or compress a file and not copy it so you will only be able to do those things with the files on your USB flash drive. We’re not sure if other file browsers will be able to let you copy files off your USB flash drive, but assuming the software does have the copy function, then there shouldn’t be any problem in doing so since the USB folder already has full permissions (chmod 777).
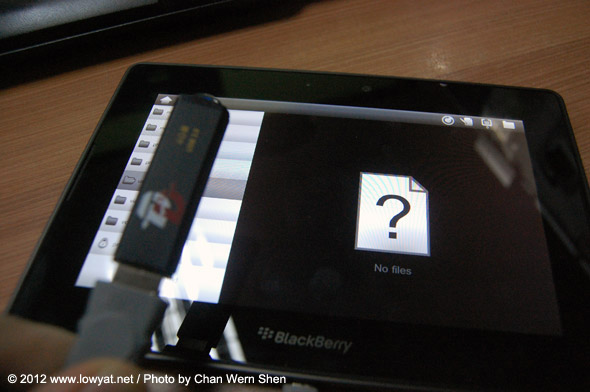
We’re sure that you’re pretty damned stoked now to have access to your USB flash drive on your PlayBook, but like all things Beta, this hack isn’t a permanent solution. In fact, it is easier to lose USB flash drive connectivity than to gain it.
After successfully hacking our PlayBook for the first time, we went for a well deserved coffee break and came back to discover that it wouldn’t detect our flash drive anymore. This seems to be a common problem that people are facing, and we have no idea how to resolve this other than to reenter the codes through SSH again. It shouldn’t take you too much time the second / third / fourth time around, since you’ll probably be used to all that typing by now, but we have to admit that it is bloody annoying.

We also discovered that all our hard work was undone by the simple act of plugging the PlayBook into a charger or connecting it to a PC. This is because the PlayBook changes the function of the USB port when different devices are plugged in. Apparently, tweaking the RIM_usbmgr-Winchester -m0s command to RIM_usbmgr-Winchester -m2 will force the PlayBook to remain in host mode, but this could mean that the PlayBook will be unable to charge / sync during that time.
There are also reports online that USB host mode causes severe memory leak issues, and we aren’t doubting the possibility at all.
But whatever it is, we had fun hacking our PlayBook to be able to read files off our USB flash drive, and by doing it we have learned a couple of things about our device too.
We’ve read that someone has connected a floppy disk drive to the PlayBook and read files off of that instead of a USB flash drive, so in theory, devices like USB card readers and external hard drives should work with this hack too.
Also, since we didn’t have to upload a single thing to our PlayBook throughout this entire process and were merely activating existing codes, we now know that the PlayBook could very well have shipped with USB host mode. However issues like the dynamic mode changes between host and slave, and of course the memory leak issues, could have been the reason as to why it was not implemented at time of shipping.
Hopefully, this means that PlayBook OS 2 will come with USB host mode turned on by default when it actually ships.
Before we call it a day, we’d like to know if you know of or have seen any awesome or cool PlayBook hack? Point us in the right direction and we’d definitely give it a try!
Disclaimer: The hack is not sanctioned by RIM in any way whatsoever. We are not responsible for any damages to your PlayBook, but if you’re like us and want to try every PlayBook tweak that you read about on the web, then do it at your own risk.
Resources: BlackBerry PlayBook USB Host (conectar pendrive) – How to @ elTechnoBlog

