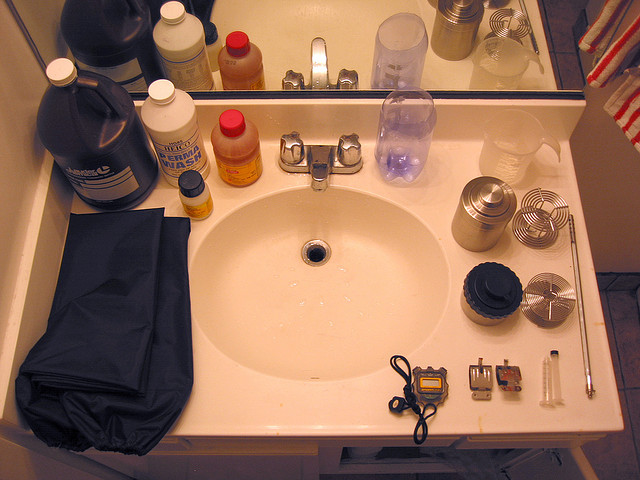
So, you’ve probably got all your chemicals and equipment, shot a roll of black and white and can’t wait to dive right into your first time developing your own black & white film at home. This week, we’ll learn the things you need to know on how to cook up your own working solution, right up to the steps you need to do to develop your film, right up to how to dry it properly for scanning.
The beauty of home developing black and white film and the big reason why you do it is that every film emulsion and developer has a different timing to get what you want. The best thing is that at this stage, you can “push or pull” your film too, meaning that you can either over develop or under develop your film, leading to a a stop or so brighter or darker exposures throughout the roll. It is this high customizability and control you have over your film that draws film photographers to self developing rather than a bog standard lab processing.
For the purpose of this article we’ll be using the example of a roll of Kodak Tri-X 400 shot at 400ISO, using Kodak HC-110 as a developer.
Article continues after the jump
Going from the canister to the development tank

The first step of developing your own film has to be practiced before you’re ready to even mix your chemicals. You need to be able to get your film from the canister you shot it in, to the film spool, into the developing tank, all in the blindness of a changing bag.
[youtube width=”550″ height=”300″]6SM5p_x4w7A[/youtube]
I suggest getting a cheap roll of film you don’t mind sacrificing to practice this in the light before you attempt to do it in the changing bag. Rather than explain how to do it, check out the video above for more detailed instructions on preparing your film for spooling and the subsequent preparation of the developing tank.
To sum up, the items you need to have in your changing bag are: The film canister, the developing tank spool, the developing tank, the cover, a pair of scissors, can opener (if needed). Firstly make sure the film leader is out of the canister with a film pick or remove the film spool from the canister with a can opener. Trim the leader and round the edges off. Feed the edge into the spool and reel it in. At the end, just trim off the canister if you didn’t remove it already. Insert the spool into the developing tank and seal it. The film is now in a light tight environment and the developing tank can be removed from the changing bag.
Mixing the chemicals

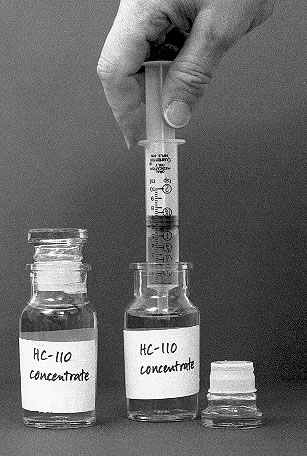
Using HC-110 as a developer is very simple. What you get in the bottle is concentrate and all you need is to make it into working solution. When you are developing 1 roll, you should be looking to mix up 300mL of working solution. HC-110 can be mixed in varying concentrations, labeled from A to H but the most common one is B, 1 part concentrate to 31 parts water. This means, for your 300mL tank, you need 9.4mL of HC-110 measured through your syringe mixed with 290.6mL of water (basically the rest of the measure).
You can find out more about HC-110 at this site here!
Once you’ve mixed up your developer, you should mix up your stop bath and fixer using the directions on the respective bottles. They can be reused, so you can just store them in your opaque bottles.
Congratulations, you now have your chemicals needed for developing!
Methodology
When it comes to developing, the chemicals need to be at a stable temperature of 20 degrees celsius (give or take 1 or 2 degrees is fine). The way I do it is fill a ziplock bag with ice and dip it into the flask holding each chemical. I would swirl it around like a teabag and then take the temperature of the solution. I will always make sure to get to about 18-19 degrees to allow for the solution to warm a little while developing.
Wearing a pair of gloves, the first step once you’ve got your solution to temperature is to get your stopwatch ready. If you’re using the app, it will look something like this. We will be doing the developing for a total of 6minutes 30seconds with a 10 second agitation every minute. An agitation can mean you invert the tank 10 times, swirl the solution for 10 seconds, but NEVER shake like a cocktail shaker! That can lead to bubbles which lead to uneven developing.

Source: Chiif Cameras
If you don’t have the app, you can start your stopwatch. Just remember at the times 0s – 10s, 1:00 – 1:10, 2:00 – 2:10, 3:00 – 3:10, 4:00 – 4:10, 5:00 – 5:10 and 6:00 to 6:10 you will have to swirl the tank around. After each agitation, you should tap the bottom of the tank against a hard surface a few times to dislodge the bubbles that may have formed. At the 6:30 mark, pour the developer down the drain.
The next step is to pour in your stop bath and let it sit for 1 minute and then pour it back into the bottle you’re keeping it in. Lastly you’ll need to pour in the fixer and just like the developer, it needs agitation for 10 seconds every minute for 5 minutes. Once that is over, you can again pour it back into its container. The last step before you can see your negatives is to give it a good rinse with water. The way I do it is the 5-10-20 method, where you fill the tank with water, agitate 5 times and pour it out. You then repeat with 10 and 20 agitations, the last set you add your hypo agent or Mama lemon to the water.

Source: Chiif Cameras
You can now remove your spool from your developing tank and you will see your images on the negatives. At this stage, what I do is either using my finger or a specially made squeegee, I’ll try to get as much water off the negative as possible. This is to prevent water rings from drying on the negative. Make sure you hang your negatives for at least an hour to dry in a dust-free and decently cool environment. If you discover water marks on your negatives, you can use some lighter fluid and a cotton bud to get rid of them.
If you’ve done it properly, you should now have a long roll of processed film for you to cut, scan and archive! Congratulations!
Some extras
Like I said before, different emulsions and different solutions develop at different times. It’s essential to have a reference to what those times are. If you have the Massive Dev Chart app, it’s a lot easier, but for those of you who don’t, here is the website for you to check out.
Once you’re confident you can shoot your 400 film at 800 or even 1600 ISO and you will be able to develop them with modified timings to make sure your film is properly exposed. This is called Pushing your film and is used often with a versatile film like Tri-X. Do check out the modified timing on your chart before you undertake a push development. The temperature and concentration of your mixture may change too.
As a note, I generally keep my Fixer and Stop Bath for 2 months or so before making a new batch.
All About HC-110 – http://www.covingtoninnovations.com/hc110/
The Massive Dev Chart – http://www.digitaltruth.com/devchart.php
Pictoral Step By Step – http://www.chiifcameras.com/
We hope you’ve enjoyed this tutorial on Black And White film development. Remember to always use gloves and wash your hands after. If you have any questions, or suggestions on what we should do next, do drop us a message at @luc_sohow or on Facebook!
Follow us on Instagram, Facebook, Twitter or Telegram for more updates and breaking news.


